
This guide will walk you through how to create different types of Custom Fields in the Metadata platform.
To create a Custom Field navigate to here
Select the option to create a new Custom Field.
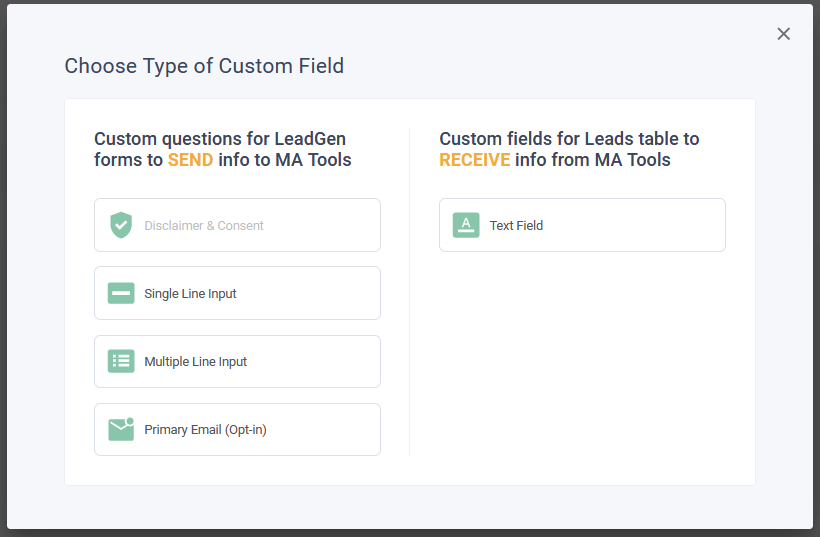
The left column (SEND) will allow you to send information to your MA Tool (Marketing Automation) and the right column (RECEIVE) will allow you to receive data from your MA Tool.
Disclaimer & Consent (SEND)
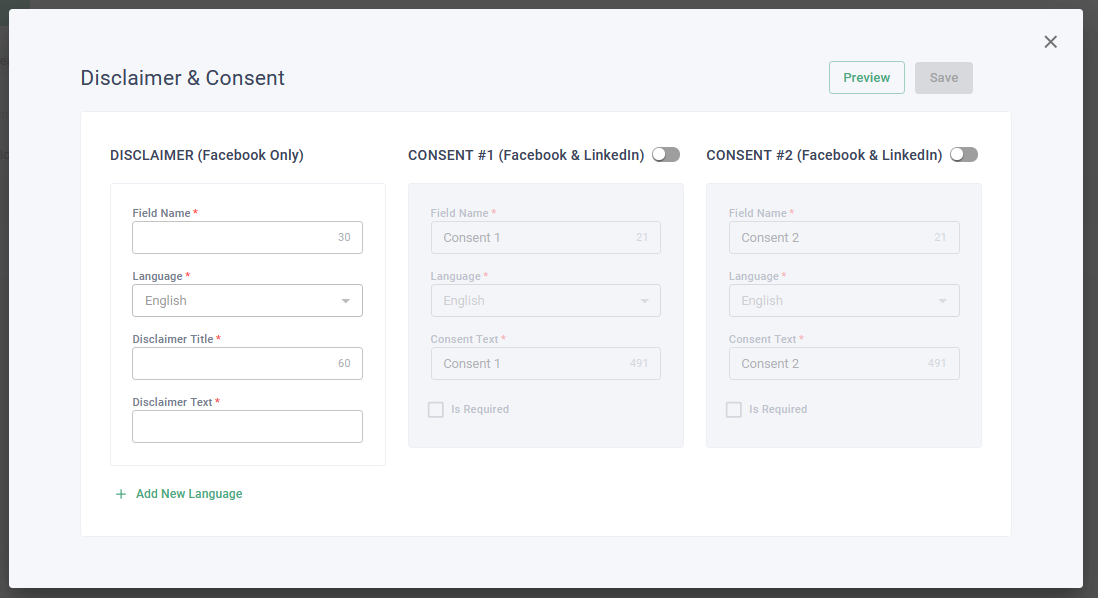
Facebook lead gen forms support one Disclaimer and two Consent fields.
LinkedIn lead gen forms support two Consent fields.
From here you will be able to toggle if you would like to show more than one Consent on the form. Once the field is created from the Lead Gen form select which one you would like to show:

Please note for Facebook in order for Consent to show you will need to have the Disclaimer field enabled as well.
Single Line Input (SEND)
Single Line Input is used as an open Text field that any value can be received to send to your MA Tool. This field type can be used in both Lead Gen forms and Landing Page offers.
Multiple Line Input (SEND)
Multiple Line Input is used to create multiple choice options on your Lead Gen form. This field type would not be used with Landing Page type offers.
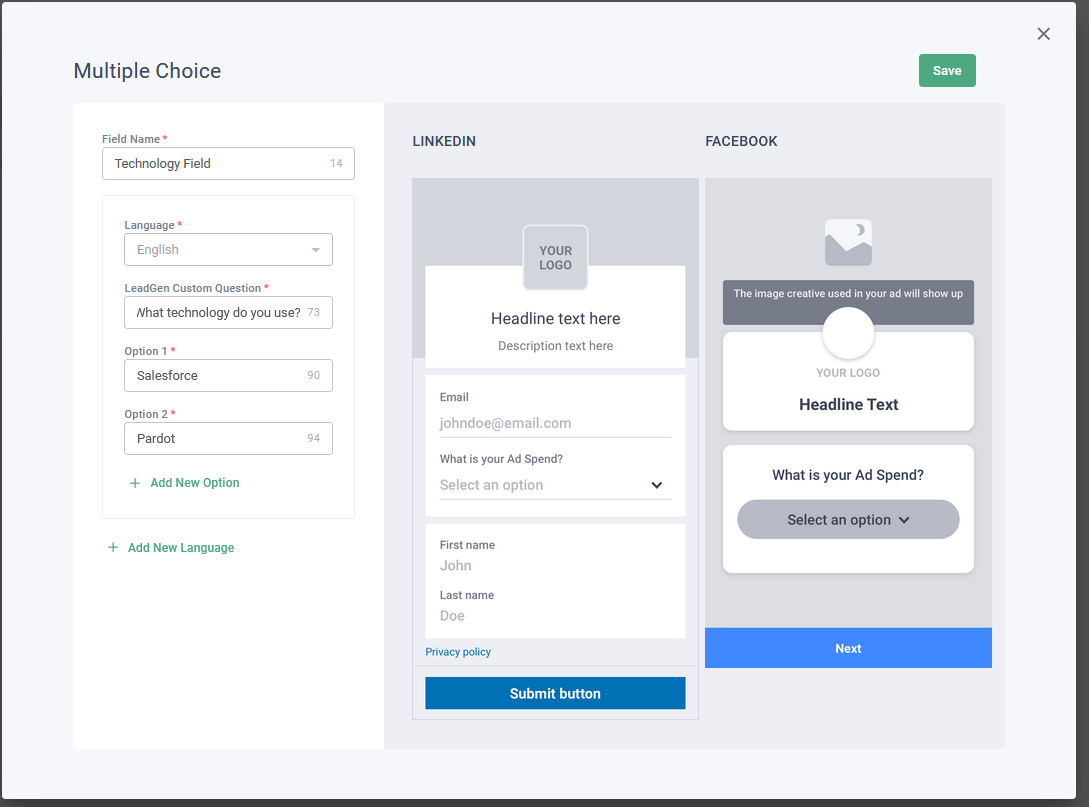
Please note that if you adjust the Multiple Choice field and change the values in order for this to update in the channel you'll need to re-create the Offer and reselect the field which will update the values.
There is also a maximum of 10 options allowed here.
Primary Email (Opt-In) (SEND)
Primary Email (Opt-In) is used to create a primary email field on your Lead Gen form as a question, for example, "What is your business email?" and this will populate the Opt-In email field on the Converted Lead.
When creating your Lead Gen form you will be able to de-select the Email / Work Email field and use this as a Custom Field instead which will force the Lead to fill their Business email on the form.

LinkedIn Lead Gen
If you are using Marketo and have the Launchpoint LinkedIn Lead Gen service configured please ensure your newly added custom opt-in email field is mapped to the primary email address field in Marketo.
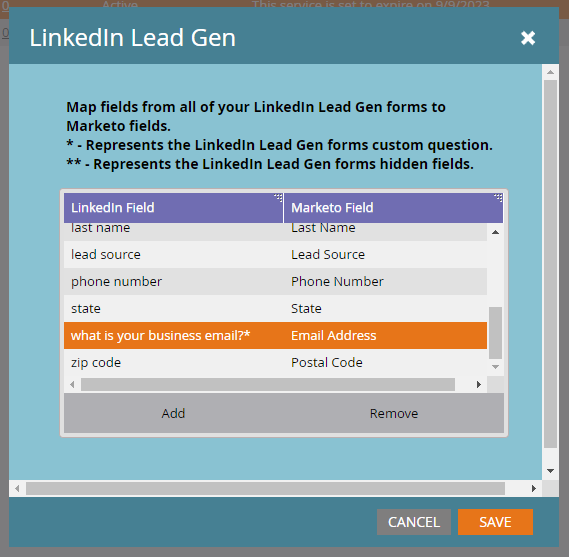
In this example I created a custom opt-in email field called "what is your business email?" and selected this to map it to the primary email address field in Marketo.
The Offer does need to be created in order for this field to show as well. In order to do this you'll have to first create the custom opt-in email field -> create a LinkedIn LGF Offer -> enable the custom opt-in email field and attach this offer to a draft campaign with the LinkedIn channel enabled, this will create the offer in the channel + the field.
Facebook Lead Ads
If you are using Marketo and have the Launchpoint Facebook Lead Ads service configured please ensure your newly added custom opt-in email field is mapped to the primary email address field in Marketo.
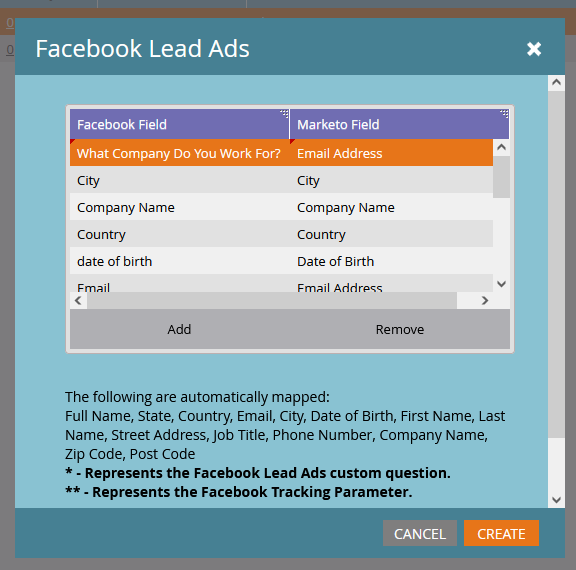
In this example I created a custom opt-in email field called "What company do you work for?" and selected this to map it to the primary email address field in Marketo.
The Offer does need to be created in order for this field to show as well. In order to do this you'll have to first create the custom opt-in email field -> create a Facebook LGF Offer -> enable the custom opt-in email field and attach this offer to a draft campaign with the Facebook channel enabled, this will create the offer in the channel + the field.
Text Field (RECEIVE)
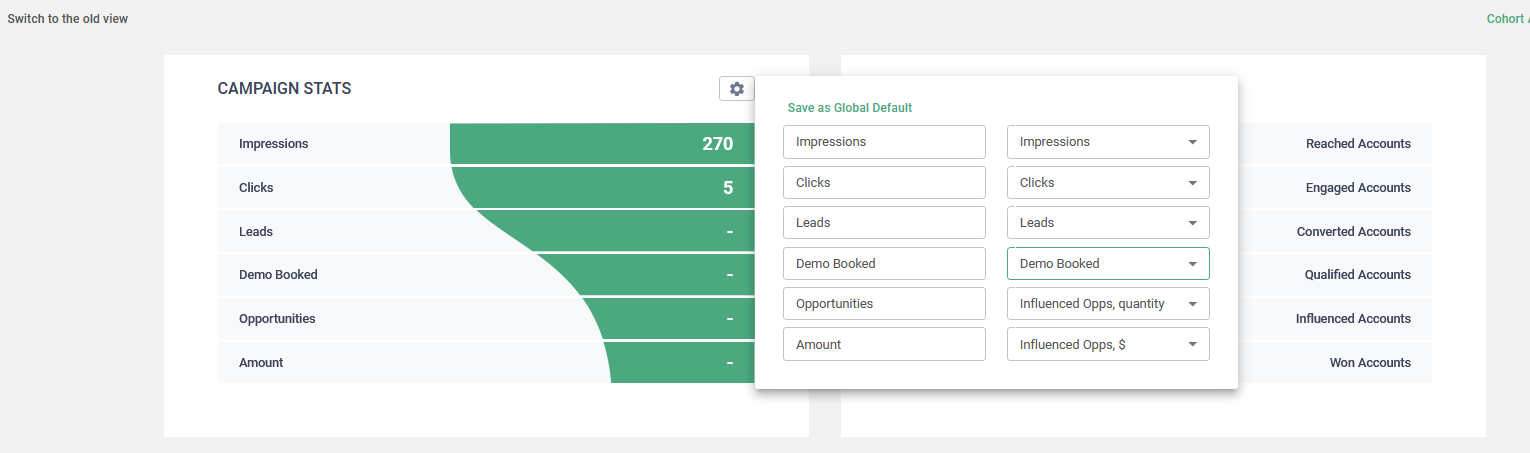
Text Field for Receive is used to accept a value from your MA Tool for example if you want to track a different KPI such as "Demo Booked".
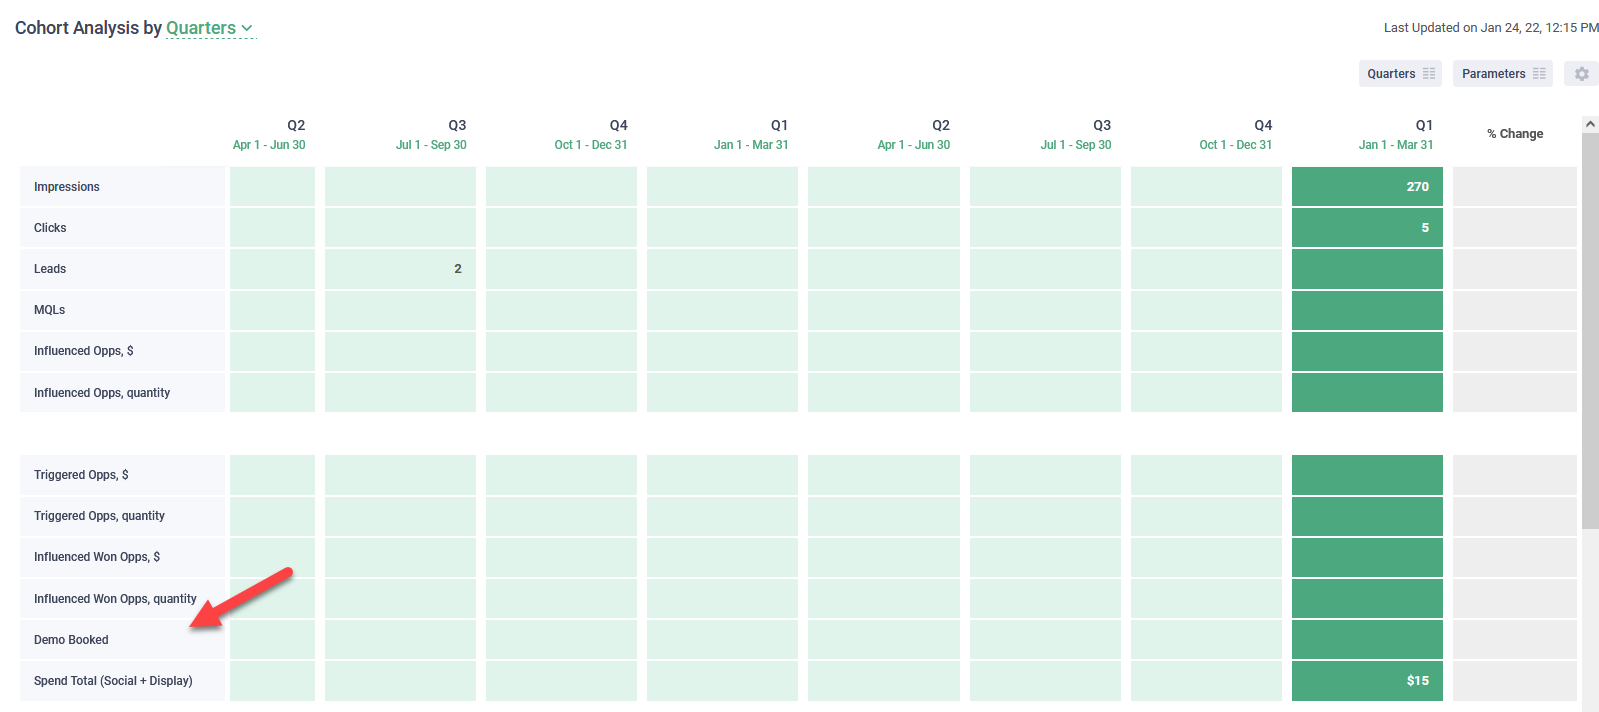
Once you have created the field if you go to Integrations and update the Field Mapping for your MA tool to receive this data you can add the field to the Dashboard and Cohort Reports.
For reporting purposes we recommend this field being a Date field in your MA tool.

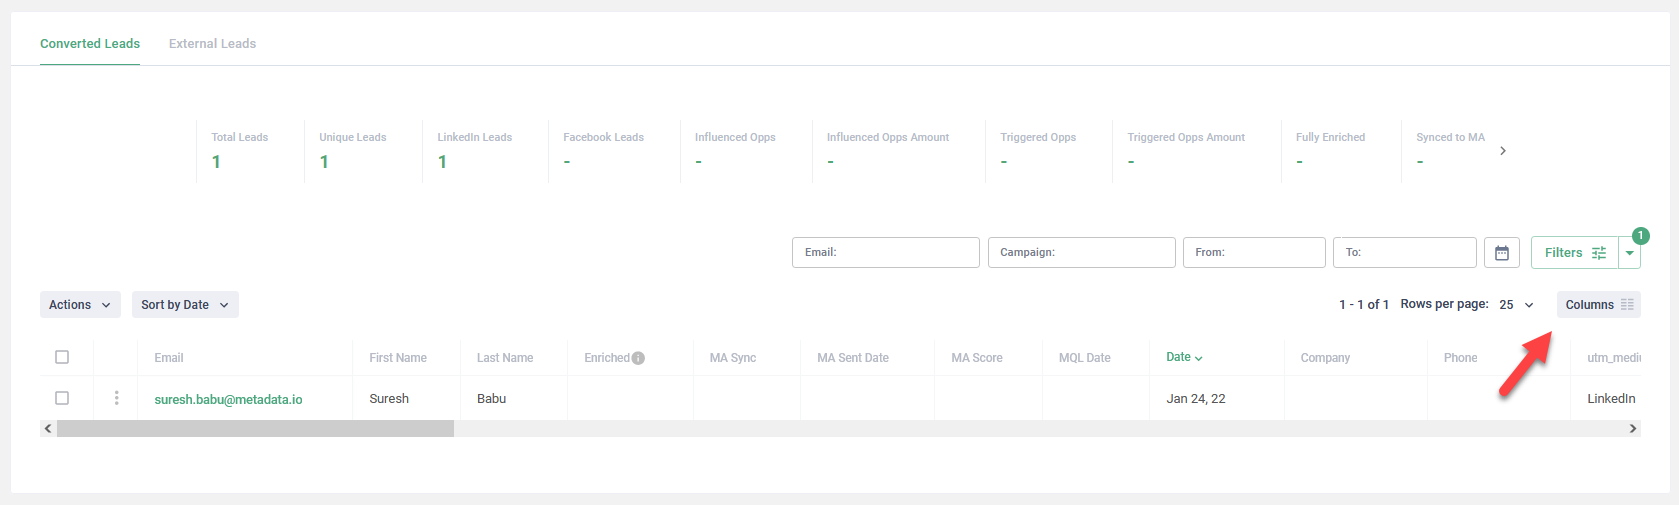
Where can I see the form fill details saved for a Custom Field?
If you navigate to Converted Leads table and open a recent Lead that converted you should see the values populated under the Custom section.
If you also click the Columns selector you may add the Custom Field to the view.

Other Important details
- After adding your Custom Field make sure to update the field mapping under Integrations for your MA Tool if you want that data to flow into your MA tool for your Lead.
- Custom Fields created to RECEIVE data from your MA Tool are updated every 24 hours.
Comments
0 comments
Article is closed for comments.